How Codevalanche works
Give the task a brief. Follow it through.
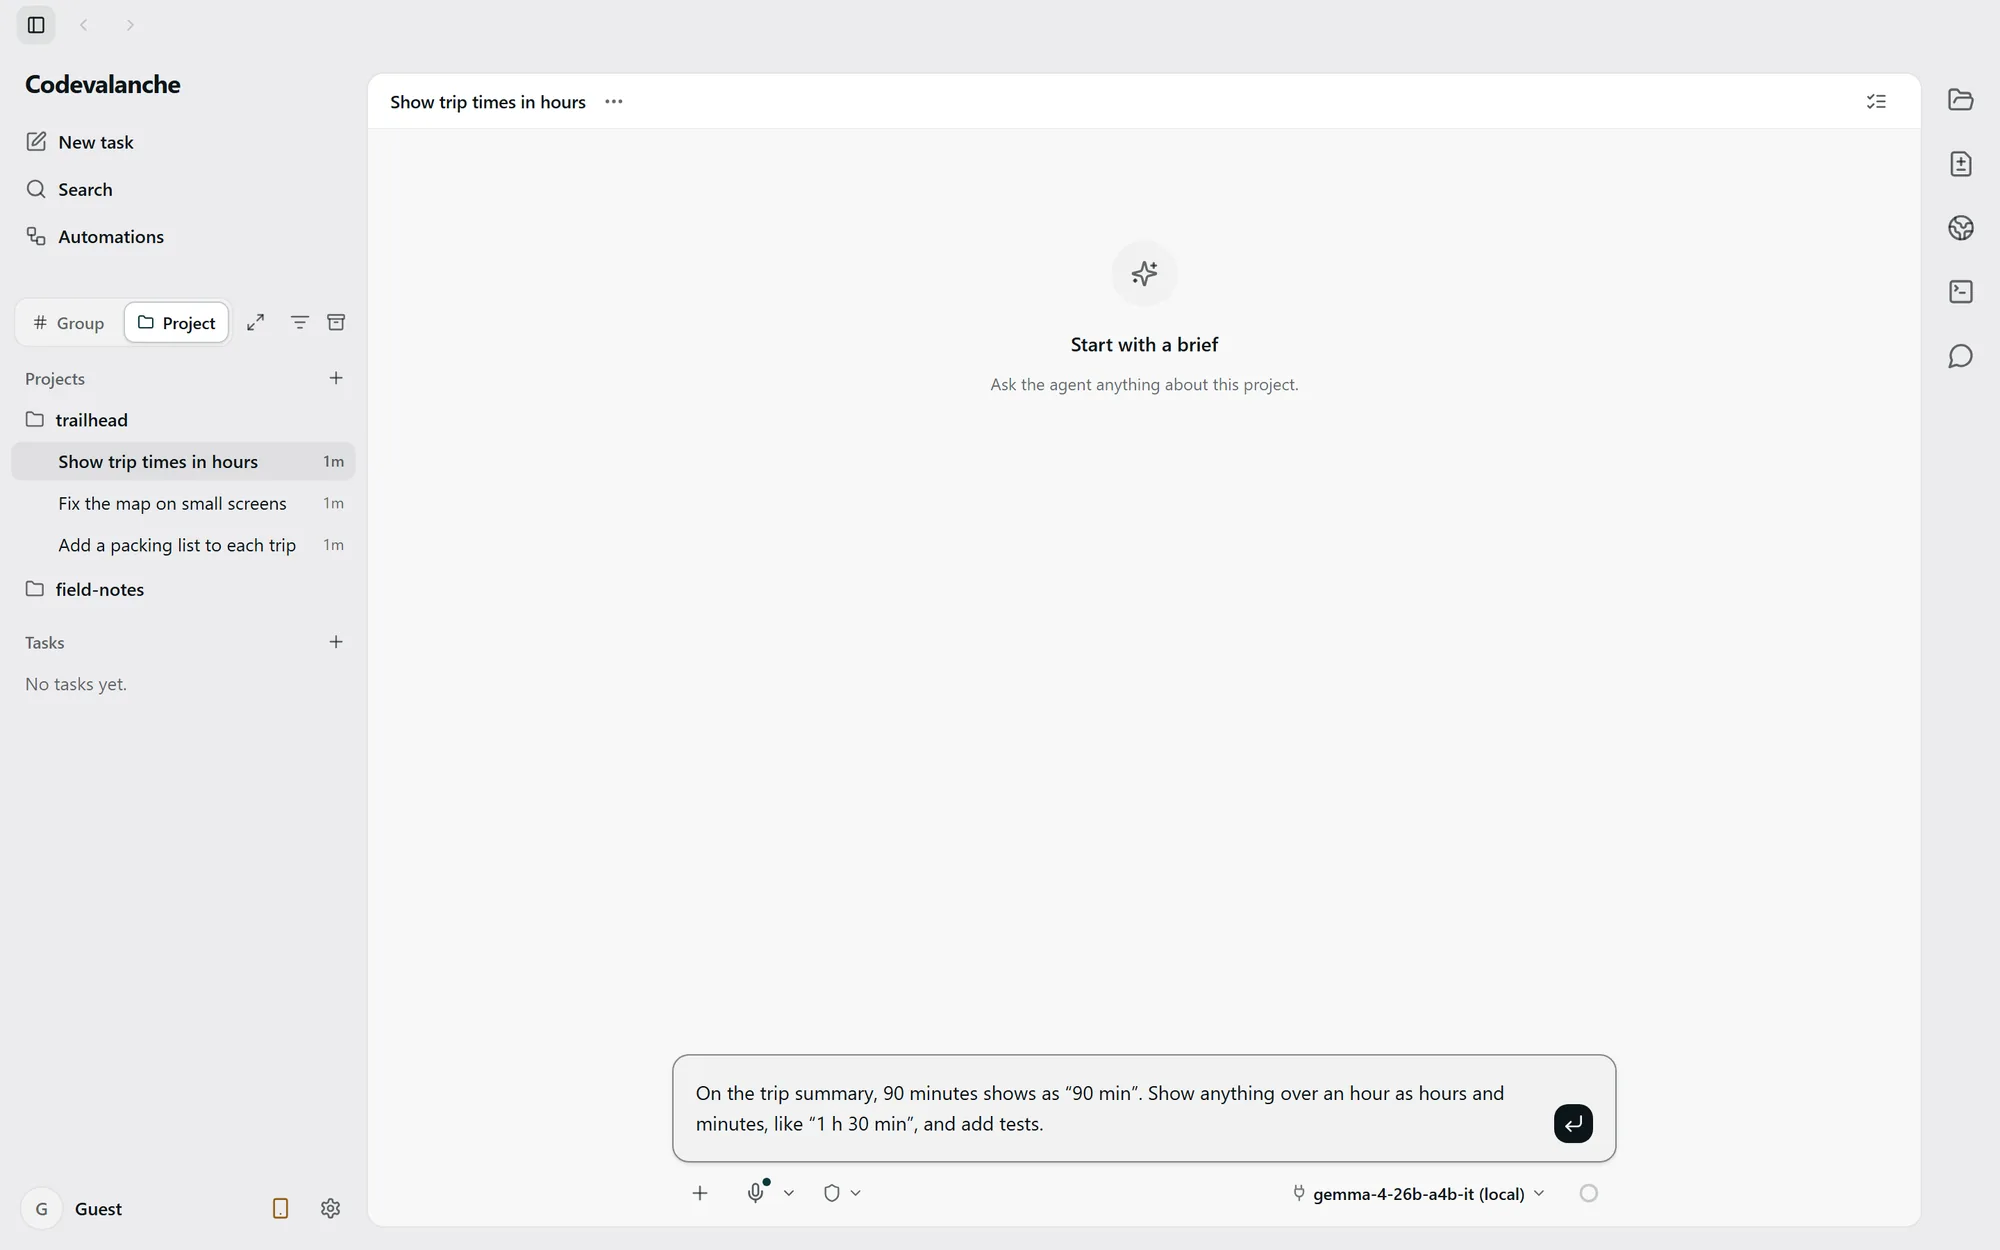
One example: change trip durations from minutes to hours and minutes. Start with a narrow request, follow the activity and inspect what changed.
From the first message to the diff.
Open the project
Use a small example repository on disk. Check its starting state so you can distinguish existing edits from the task’s changes.
Choose the connection and write the brief
Select an available agent or local model. For Claude Code and Codex, check the chosen account. Ask for durations above one hour to use hours and minutes, and request tests.
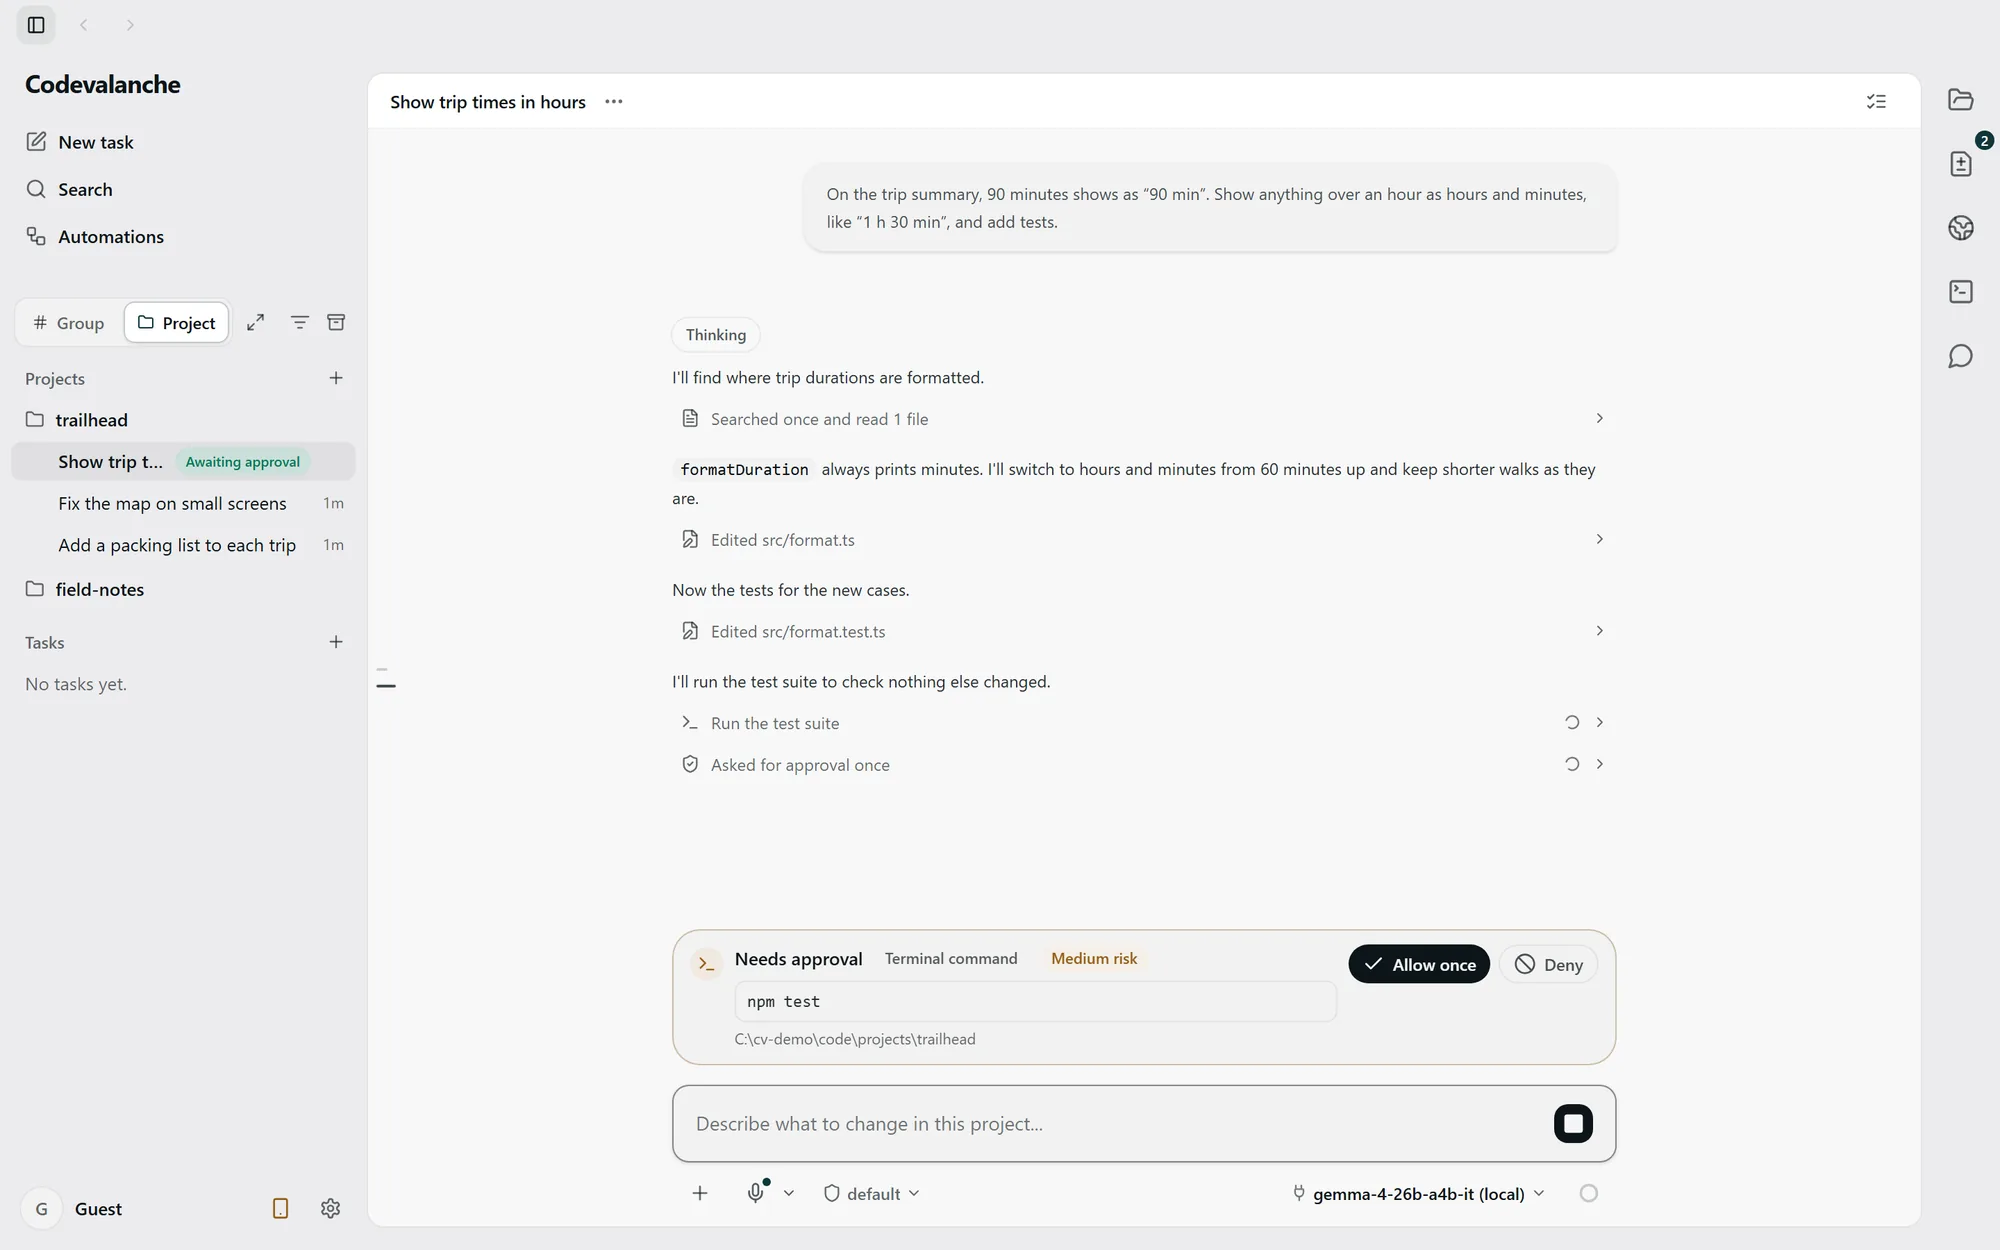
Follow the activity
Read the agent’s steps and any request for input. When a command needs permission, inspect the command and its scope before allowing or denying it.
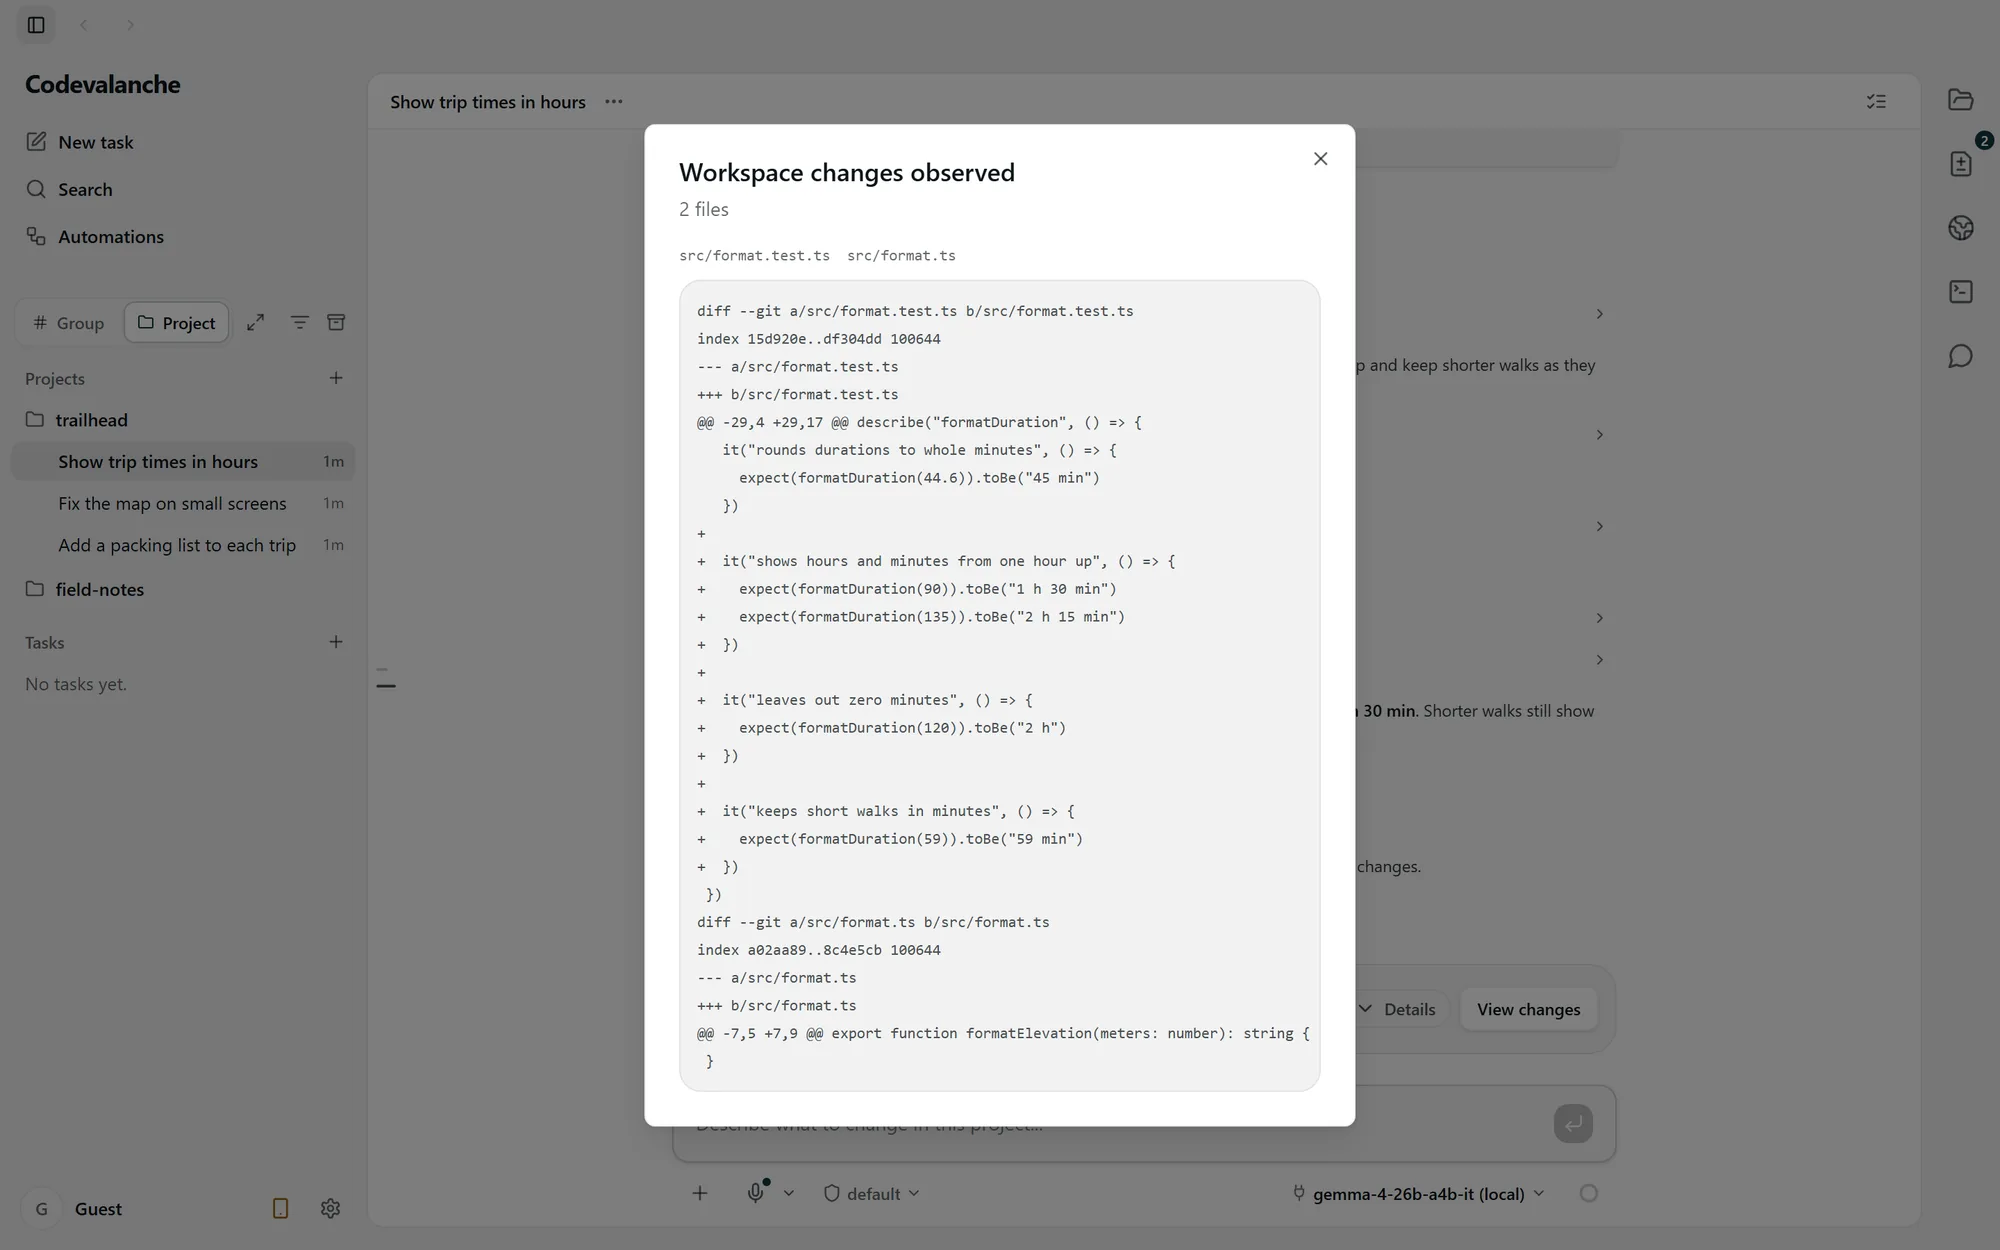
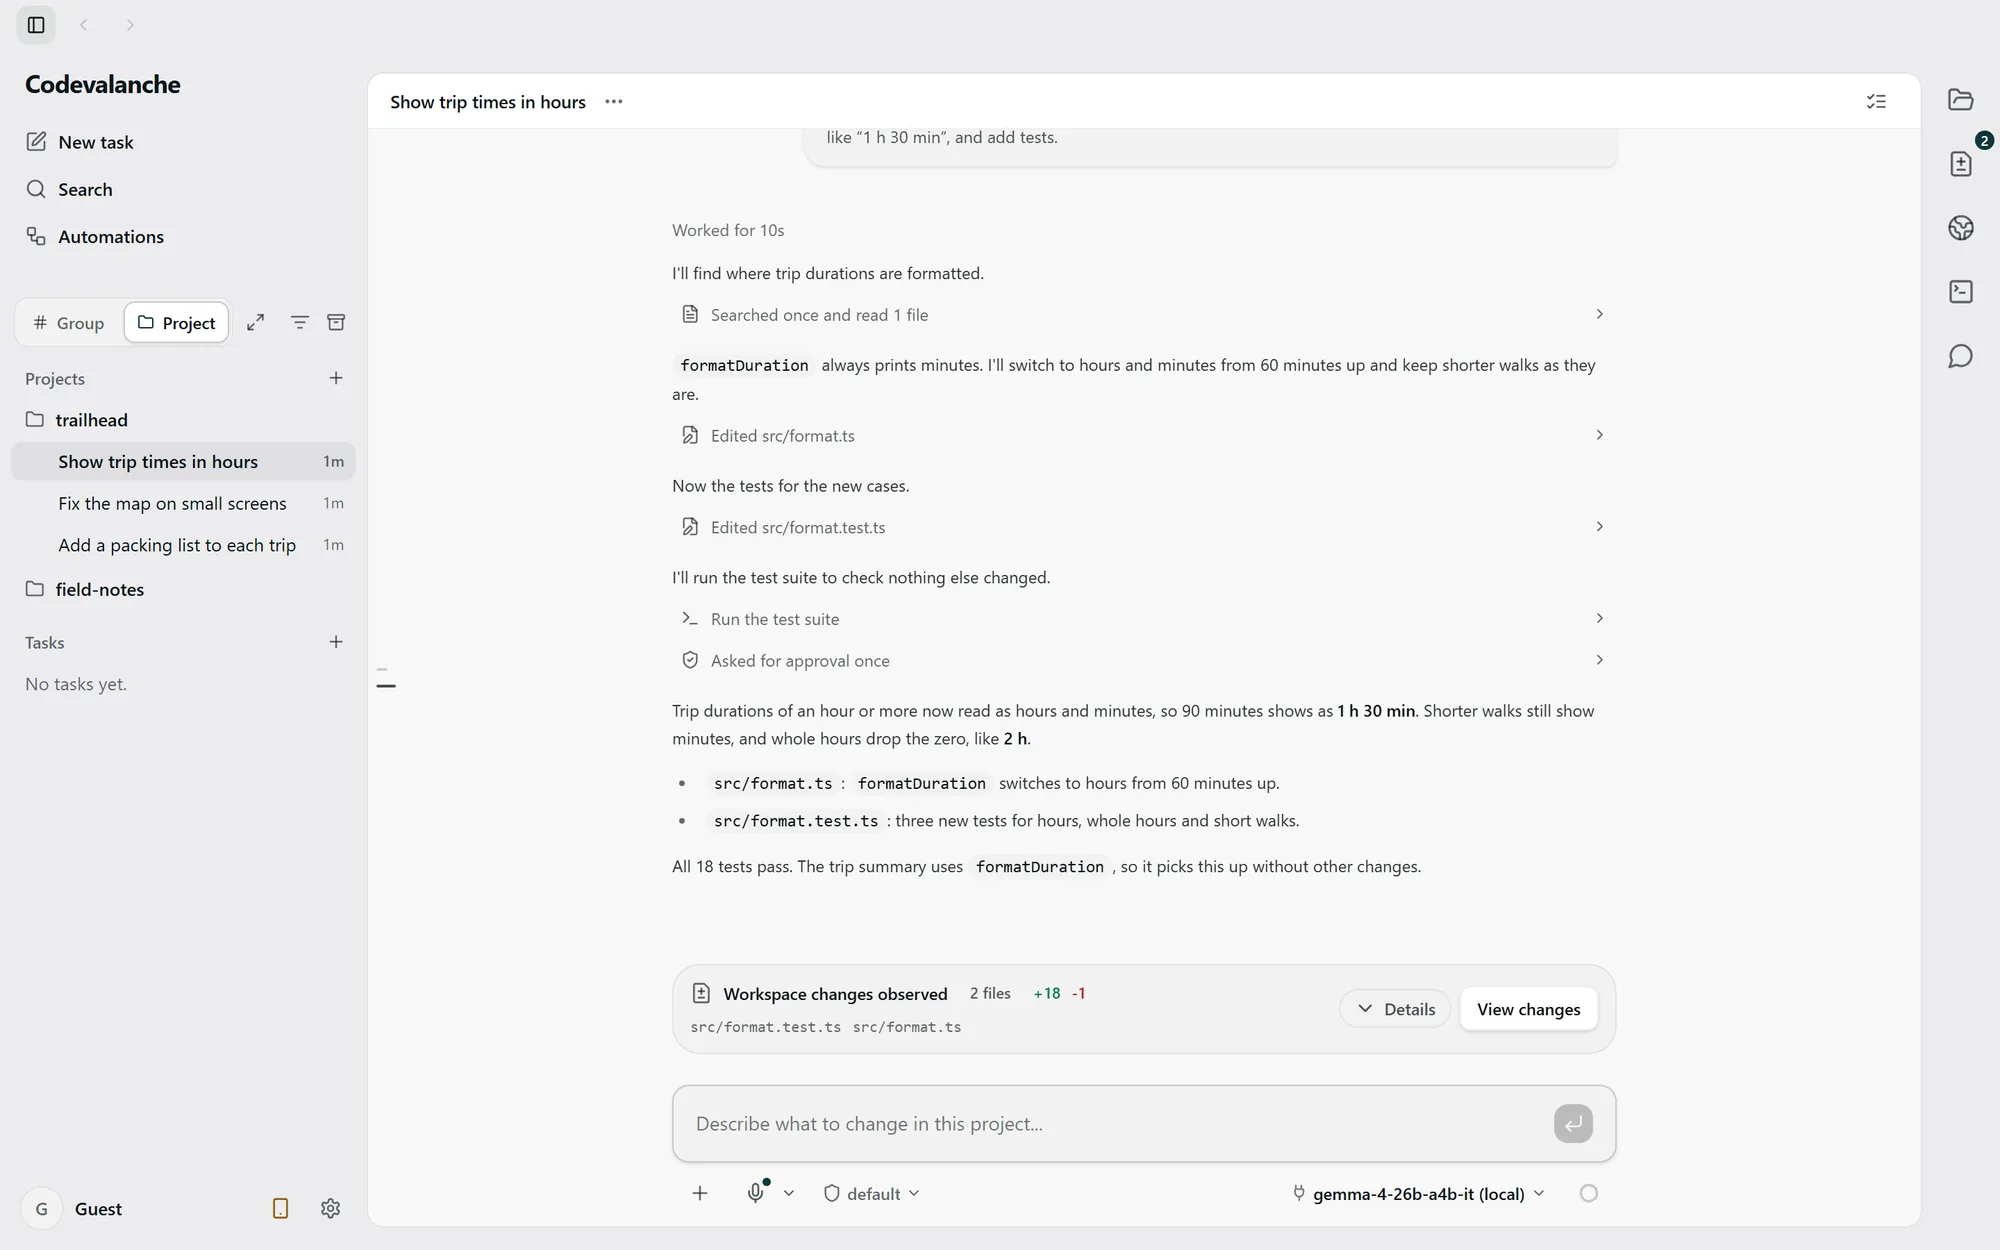
Inspect the changes
Open the changed files and read the diff. Check the duration examples yourself and run the project’s relevant tests before accepting the result.
Three views of the same example.
These are separate application captures, not a live demonstration or a verified continuous recording. Open an image to inspect the full view.